The Best Way to Wash Your Car Without Creating Swirl Marks
Most car owners are unknowingly damaging their paint every time they wash it. The swirl marks and fine scratches that accumulate on daily driven vehicles do not just appear from nowhere — they are largely created during the washing process itself, through a combination of improper technique and inadequate products. The good news is that washing correctly is not complicated or expensive. It requires the right technique, the right tools, and understanding why each step matters.
Why Standard Washing Creates Swirl Marks
Swirl marks form when abrasive particles are dragged across your clear coat surface. During a typical car wash, the paint surface is covered in fine road dust, grit, and biological contamination. When a wash mitt, sponge, or cloth contacts this contaminated surface and is moved in any direction — especially in the circular scrubbing motion that most people use naturally — those particles are dragged across the paint like fine sandpaper. The scratches left behind are fine enough to be invisible in diffuse light but form the hazy, swirled appearance that becomes obvious under direct sunlight. This process happens in automatic car washes through the brushes rotating against accumulated contamination, and it happens in hand washing through improper technique.
The Two-Bucket Method: The Foundation of Safe Washing
The two-bucket method is the professional standard for preventing wash-induced swirl marks. It is exactly what it sounds like — two buckets instead of one. Bucket one contains your wash solution — pH-neutral car shampoo in clean water. Bucket two contains clean rinse water with a grit guard insert at the bottom. The grit guard is a plastic grid that traps dirt below it. After washing each panel, you rinse your wash mitt thoroughly in bucket two before picking up more soapy water from bucket one. The dirt you washed off goes to the bottom of the rinse bucket and stays there rather than being picked back up onto the mitt and dragged across the next panel. This single change prevents the accumulation of grit on your wash mitt that is the primary cause of contact-induced swirl marks.
Pre-Wash Before Any Contact
Before your wash mitt touches the paint, rinse the vehicle thoroughly with clean water from a hose or pressure washer. Every gram of loose dirt removed in a contactless rinse is one fewer source of potential scratching. Better still, apply a foam cannon pre-wash — a thick layer of pH-neutral foam that dwells on the surface for two to three minutes, loosening and partially removing surface contamination through chemistry rather than contact. The foam stage alone can remove fifty to seventy percent of loose surface contamination before any mitt contact occurs.
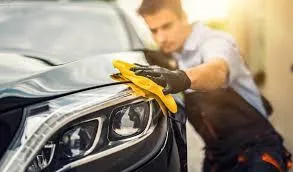
Use the Right Wash Mitt and Technique
A high-quality microfiber wash mitt is essential. Sponges are the worst choice — their flat, dense face traps dirt against the paint surface and drags it with every stroke. A quality microfiber mitt has long, deep pile fibers that lift dirt up away from the paint-contacting face of the mitt. Always start at the roof and work downward, finishing at the lower rocker panels and door sills which carry the most contamination. Use straight front-to-back strokes rather than circular motions — if any fine scratching does occur despite best technique, straight-line marks are significantly less visible than circular swirl patterns.
Dry Carefully
Drying is where many otherwise careful wash routines introduce scratches. Use a large, plush microfiber drying towel and blot or gently wipe sections rather than dragging aggressively. A forced-air car dryer is the safest drying method as it removes water through air pressure with zero surface contact. Never let a vehicle air-dry in Texas sun — water spots form within minutes and mineral deposits can etch into unprotected paint over time.
If your paint already has swirl marks from previous washing, paint correction removes them. After correction, a ceramic coating protects the corrected surface. Book a detail with KlenCars across Austin, Cedar Park, Leander, Liberty Hill, and West Lake Hills.
Building a Sustainable Washing Routine for Texas Vehicles
The right washing routine for a Central Texas vehicle accounts for the specific contamination challenges here — particularly the six-month pollen season, the hard water in the Austin metro area, and the summer heat that makes drying time extremely short. During active pollen season from December through May, rinsing your vehicle every few days with clean water — even without a full wash — prevents pollen from sitting long enough to bond to the paint surface. Fresh pollen rinses off with no contact required. Pollen that has been sitting for a week in warm conditions may require gentle washing to remove. This prevention-focused rinsing during pollen season is the single most effective thing you can do to protect your paint during the months when the biological contamination risk is highest.
For vehicles with a ceramic coating, the washing routine becomes simpler and the results better at every step. The hydrophobic surface causes the foam pre-wash stage to lift contamination more effectively, the two-bucket wash stage removes road film with less physical pressure required, and drying is faster because water beads and rolls off rather than sheeting across the surface. Many coated vehicle owners find that a thorough rinse is sufficient for lightly soiled vehicles between full washes, which reduces both the time and the abrasive contact required to maintain the vehicle in clean condition. The investment in a coating pays dividends in every aspect of the ongoing maintenance experience, including making each individual wash faster, easier, and less likely to introduce the fine scratches that accumulate into swirl marks over time on unprotected paint.